This guide shows you how to record a note, save it, find it again, and use it in another application.
Before you start
AICHE is installed and you are signed in. To retain completed dictations in Notes, make sure Keep history is enabled in Settings > Privacy & Data. Local models are optional; Notes works without them. For local transcription, enable Dictation and notes in Models and see Set up on-device processing on Linux.
Step 1: Record a note or import a recording
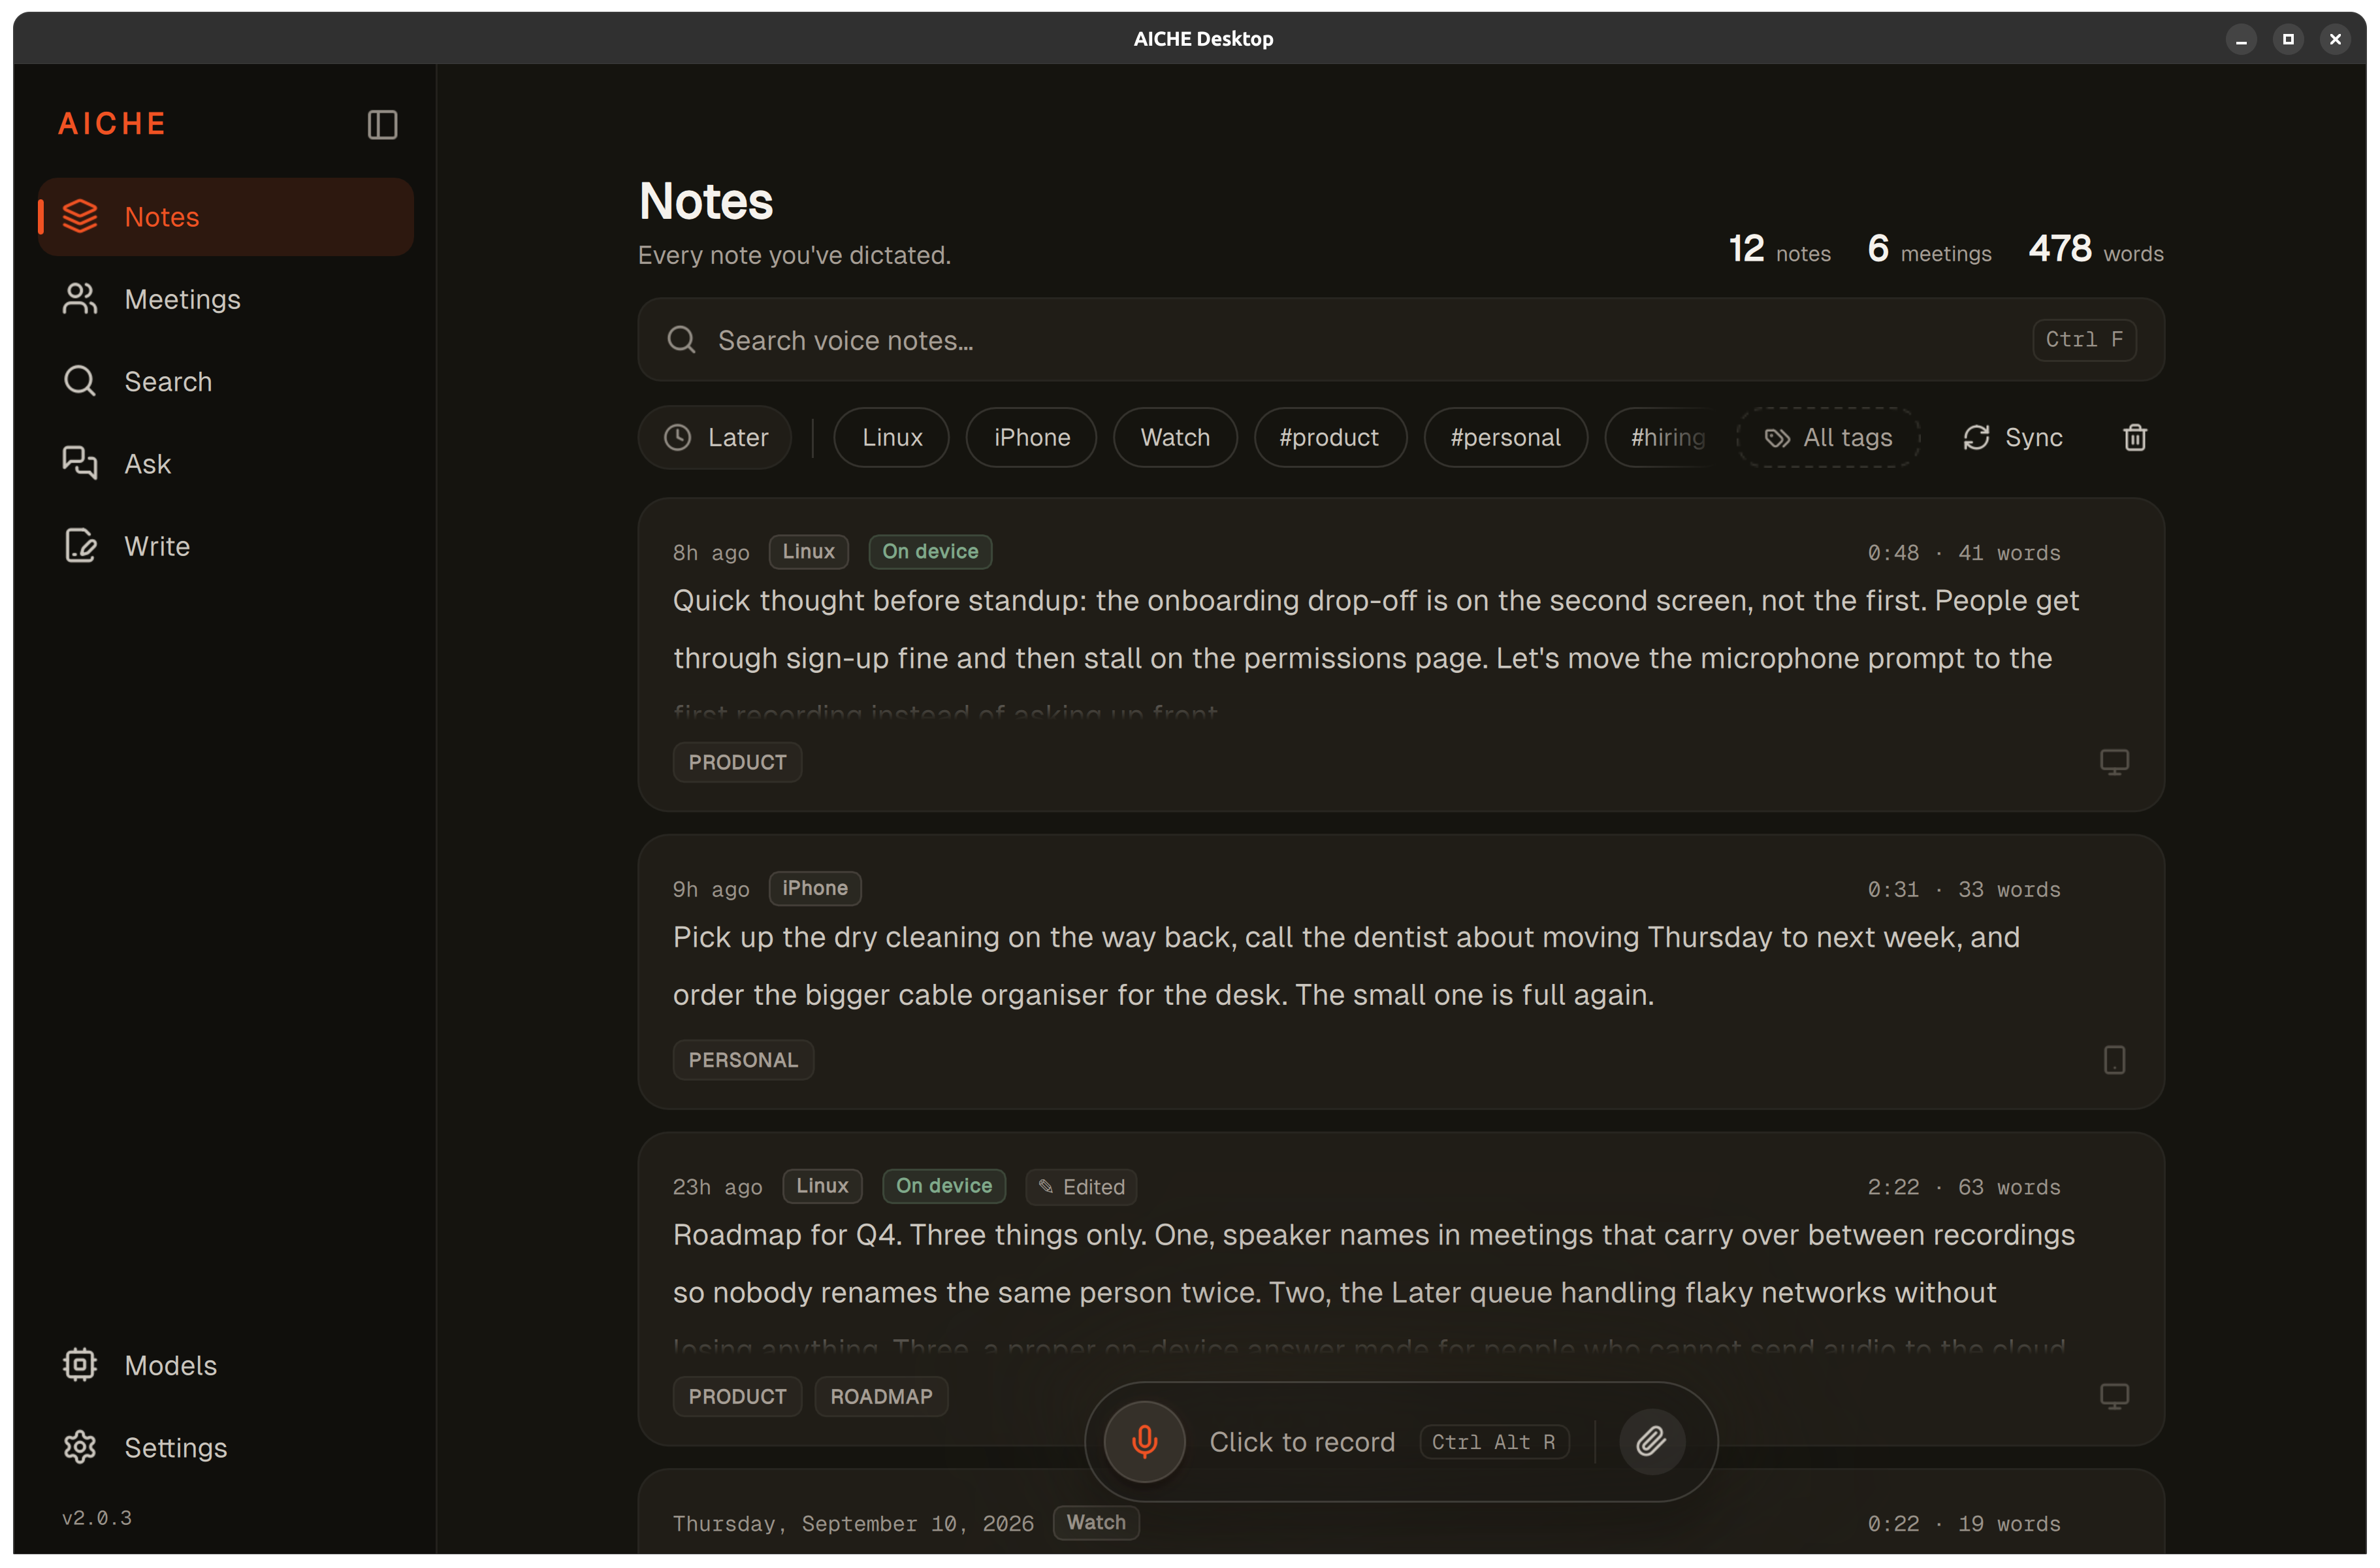
Open Notes. Press Ctrl+Alt+R to start recording; press it again to stop. Wait for transcription. When Keep history is enabled, the finished note appears in the feed.
To bring an existing recording into Notes, use the paperclip icon, Ctrl+O, or drag the file onto the Notes screen. This produces a text note, not a transcript organized by speaker. For speaker-labelled meeting transcripts, use Record and transcribe your first meeting.
Step 2: Open and reuse the result
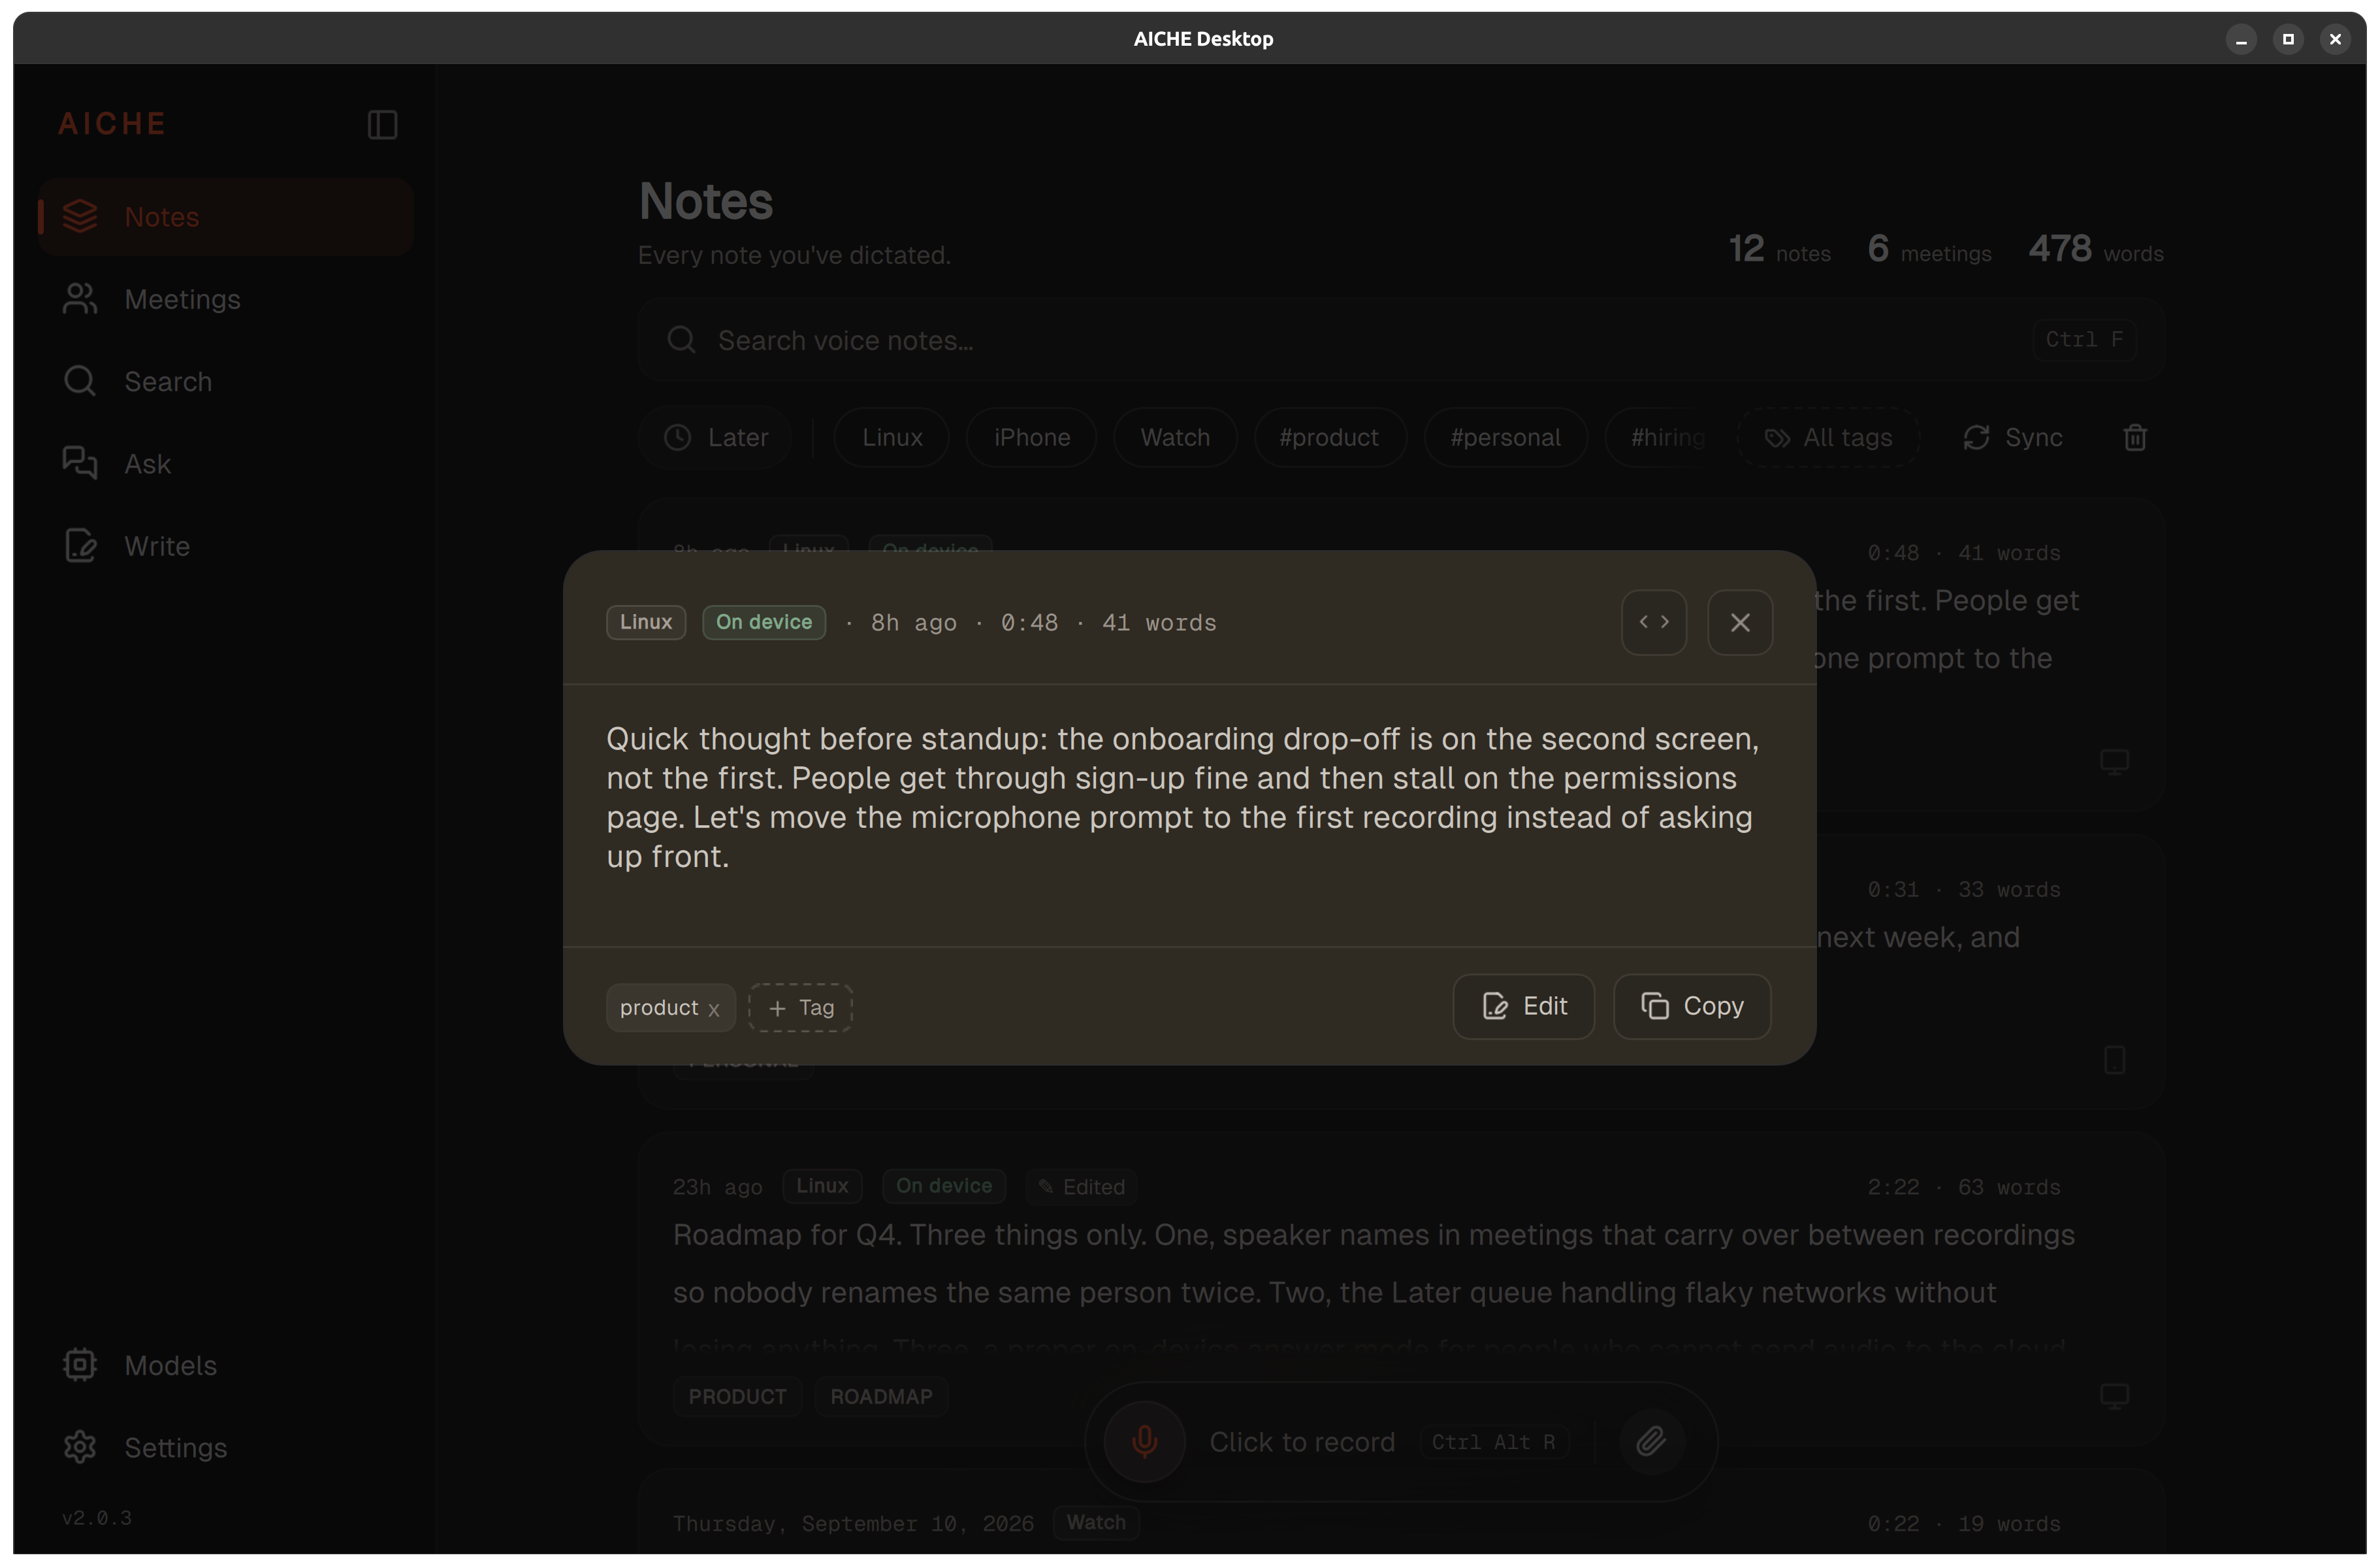
Open the note card to view the full text. The header shows the source device, the time the note was created, its duration and word count.
Choose Copy, then paste the text into another application. Notes display Markdown content.
A completed note contains transcribed text. Unprocessed recordings are kept separately in Later; Notes is not an audio playback library.
Step 3: Add tags and find a note
Open a note, choose Tag, type a label and press Enter. Add multiple tags when useful. Remove a tag from the note by clicking the x on its chip.
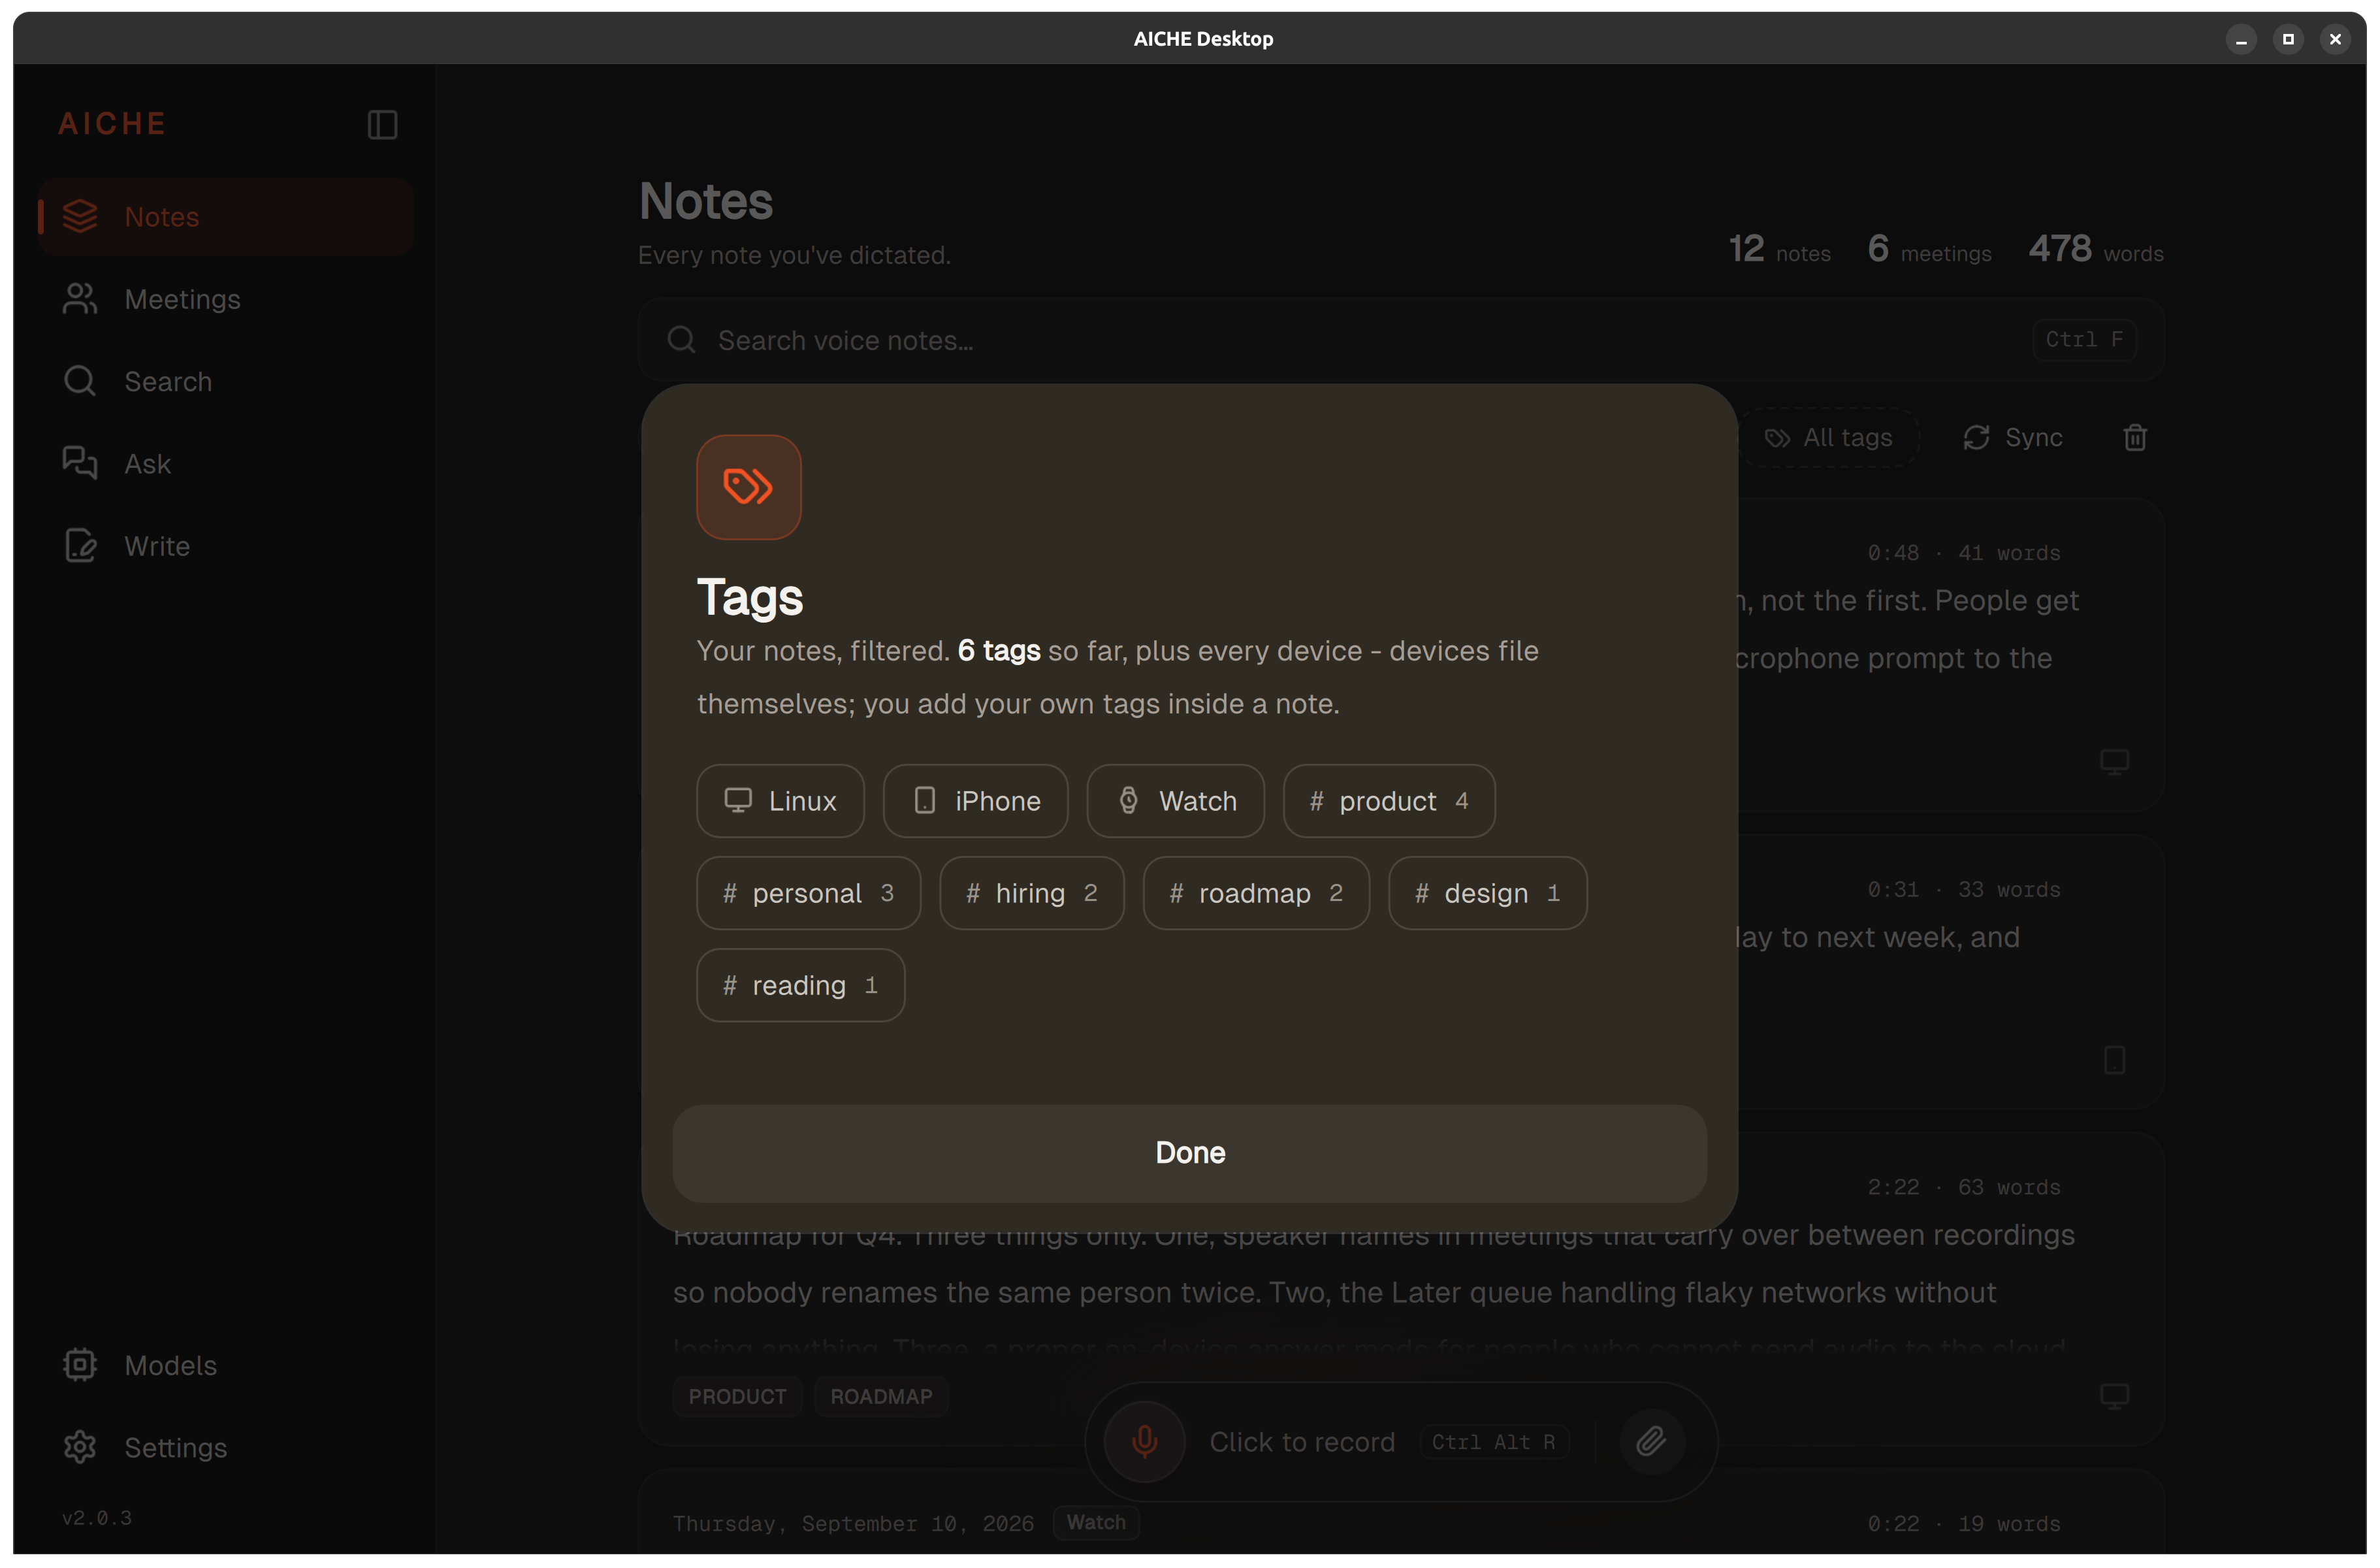
Use the note search field to find a note by its text. Filter by device with the device pills, such as Linux, iPhone or Watch. Open All tags to see the available tag and device filters, then select one to filter your notes.
Tags are user-added and stay on the current device. Device labels are automatic.
Step 4: Edit or remove a note
Edit text directly in the detail view, or choose Edit to open the note in Write. Changes made in Write save back to the original note. Because the note synchronizes with Cloud Sync, these changes appear on other devices. Write is a cloud-based workflow.
To remove a note, open the note card menu and choose Delete. An Undo toast appears immediately after deletion, allowing you to restore the note.
There is no Save button; notes save automatically.
Step 5: Process an offline or pending recording
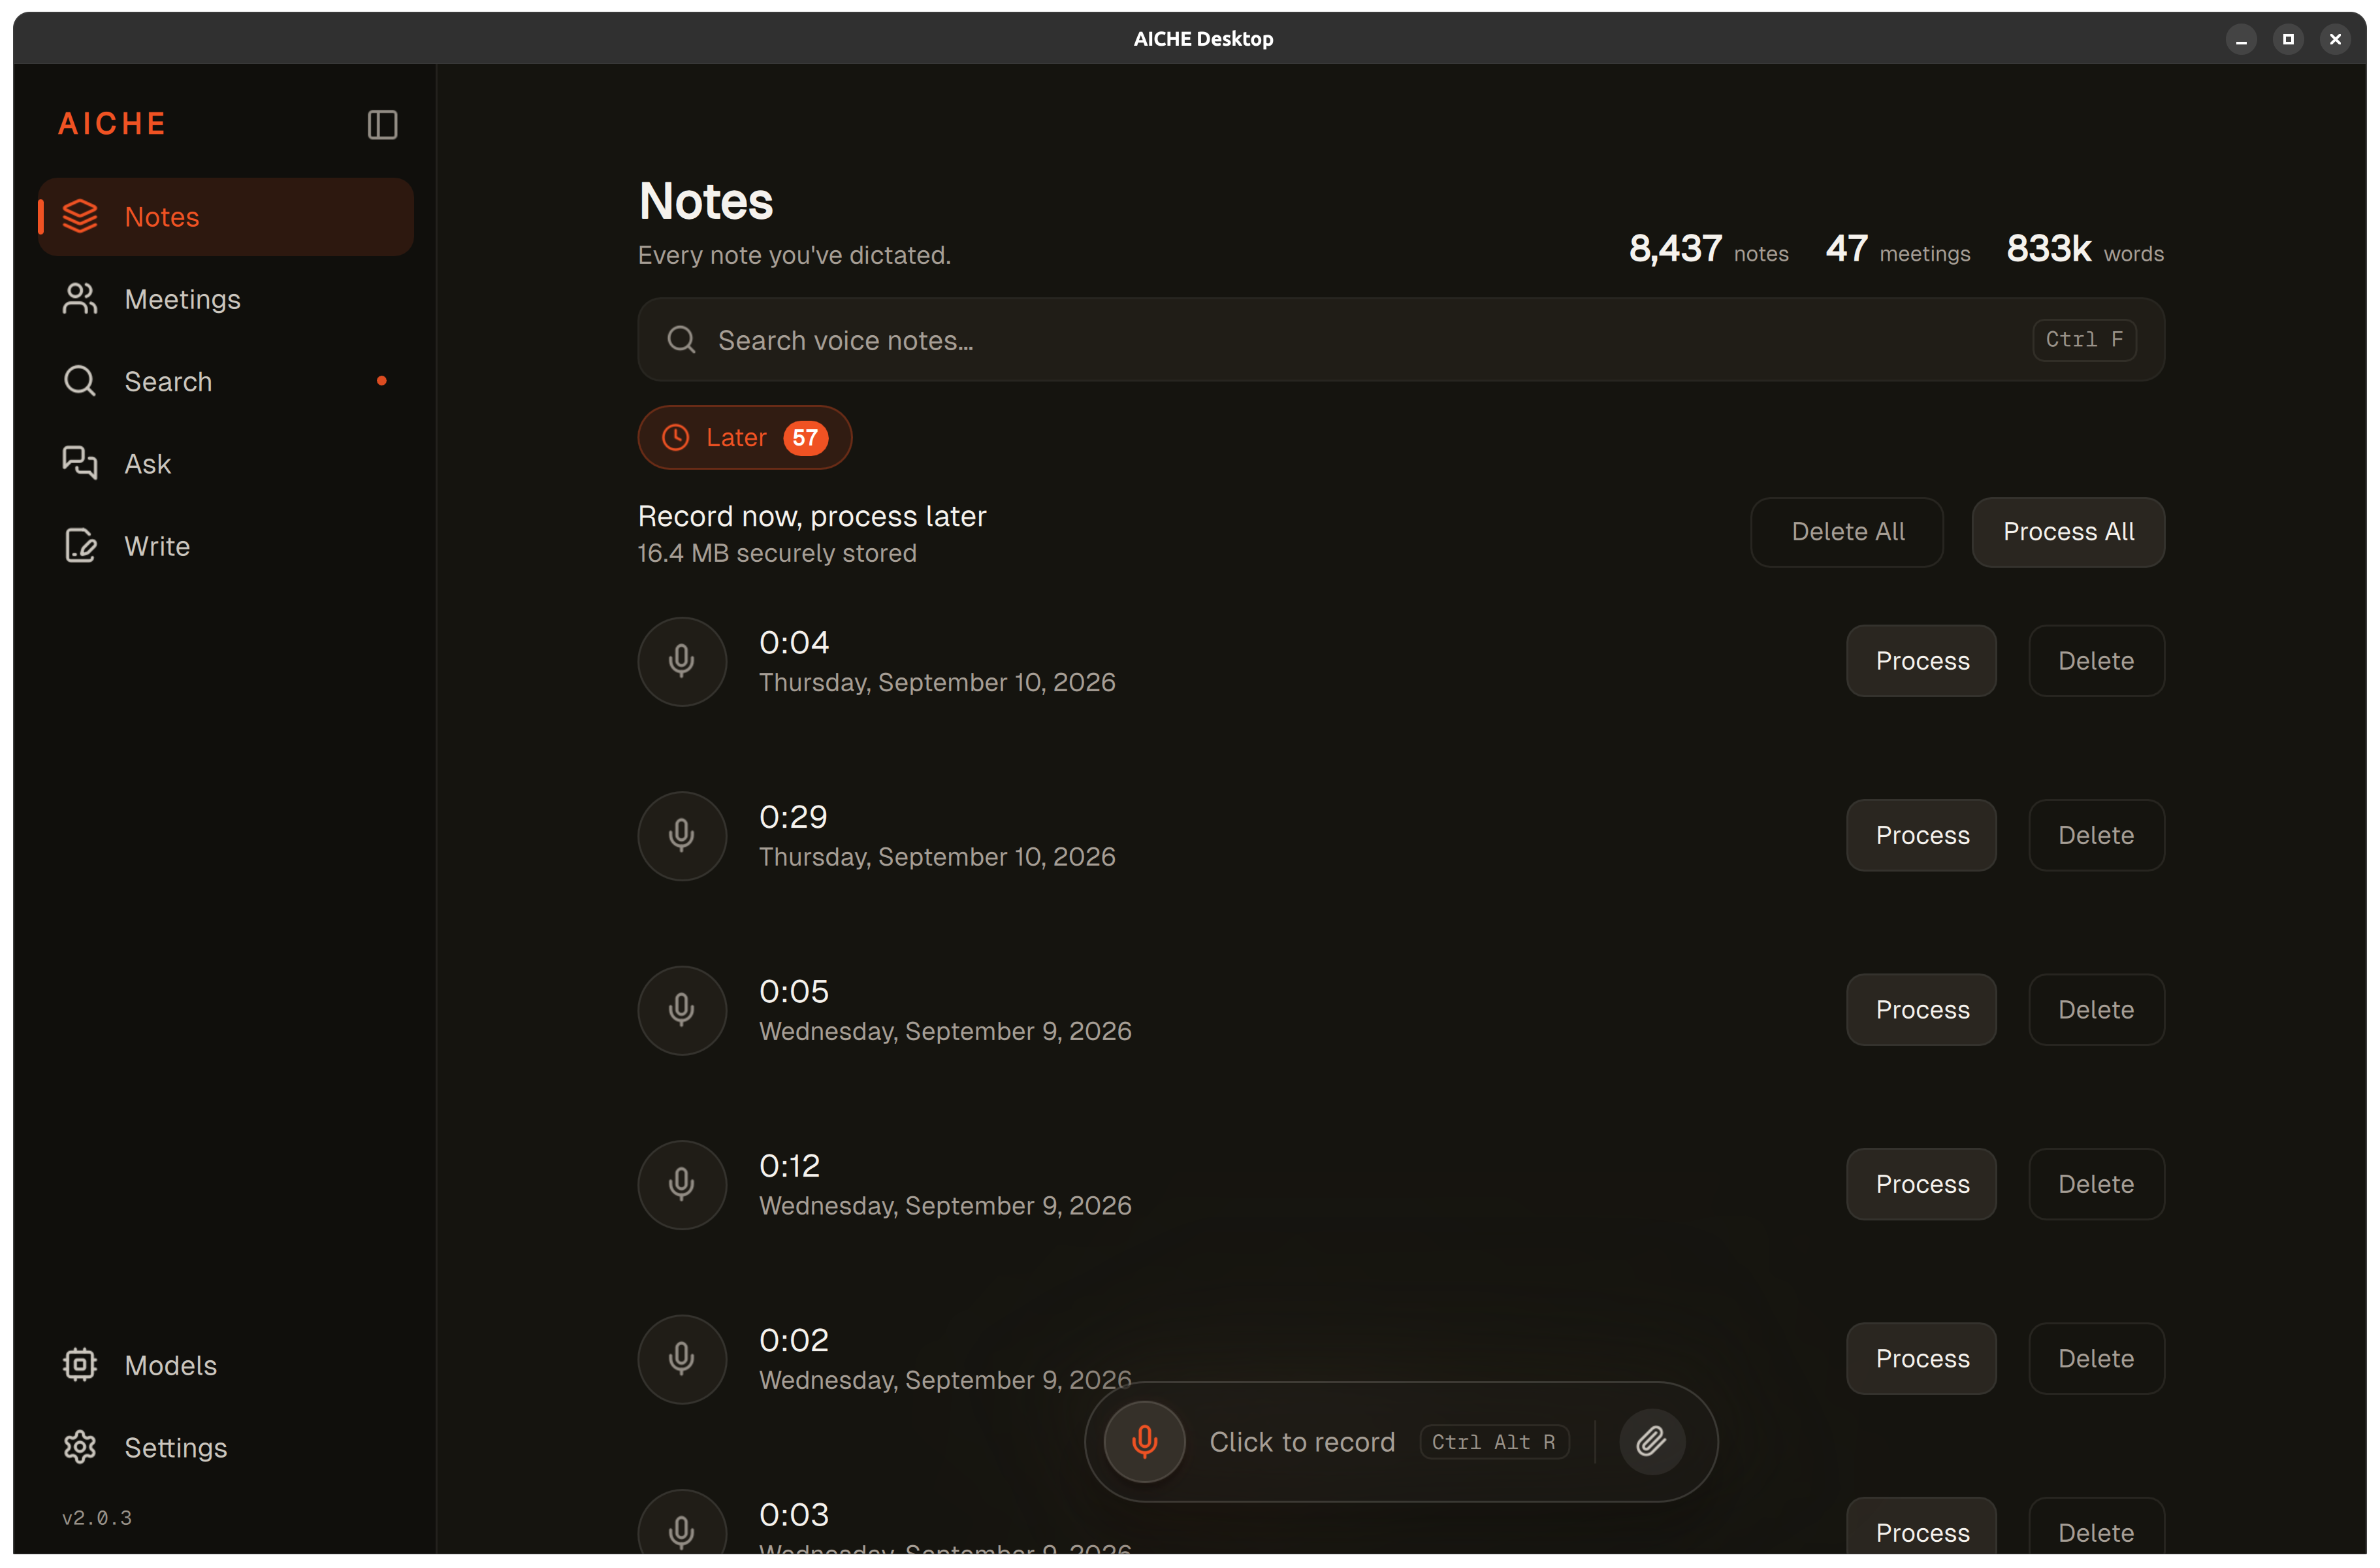
With local processing enabled, you can transcribe recordings without an internet connection. You can also record offline and process later. Recordings waiting in Later can be processed on your device, or in the cloud when you are connected.
Open Notes > Later and choose Process for one recording or Process All for the queue. Processing follows Models > Dictation and notes. If you also want local text cleanup, that follows Text enhancement separately. When processing succeeds, the text appears in Notes and the recording leaves Later.
An interrupted attempt can also be retried from Later. Recordings stay in Later until you process or delete them.
Step 6: Optionally sync your notes
Optional Cloud Sync synchronizes your notes across devices with end-to-end encryption. Set it up in Settings > Preferences > Cloud Sync. For passphrase setup and connecting another device, see the Cloud Sync guide.
Notes synchronize; tags stay on the current device. Meeting transcripts, Write drafts and audio recordings do not synchronize.
Where to go next:
- Voice notes for Linux: what you can do with Notes.
- Set up on-device processing on Linux: local transcription and model setup.
- Record and transcribe your first meeting: record, transcribe, and summarize meetings.