This guide walks you through getting a meeting recorded, transcribed, and summarized in AICHE, from start to result.
Before you start
AICHE can process meetings in the cloud or on your device.
For on-device processing, open Models and enable Meetings for local transcription and speaker separation. Enable Text enhancement for local summaries.
On-device processing and online-call recording require AICHE Professional.
Step 1: Start the recording
Open the Meetings page from the sidebar. You'll see three ways to begin:
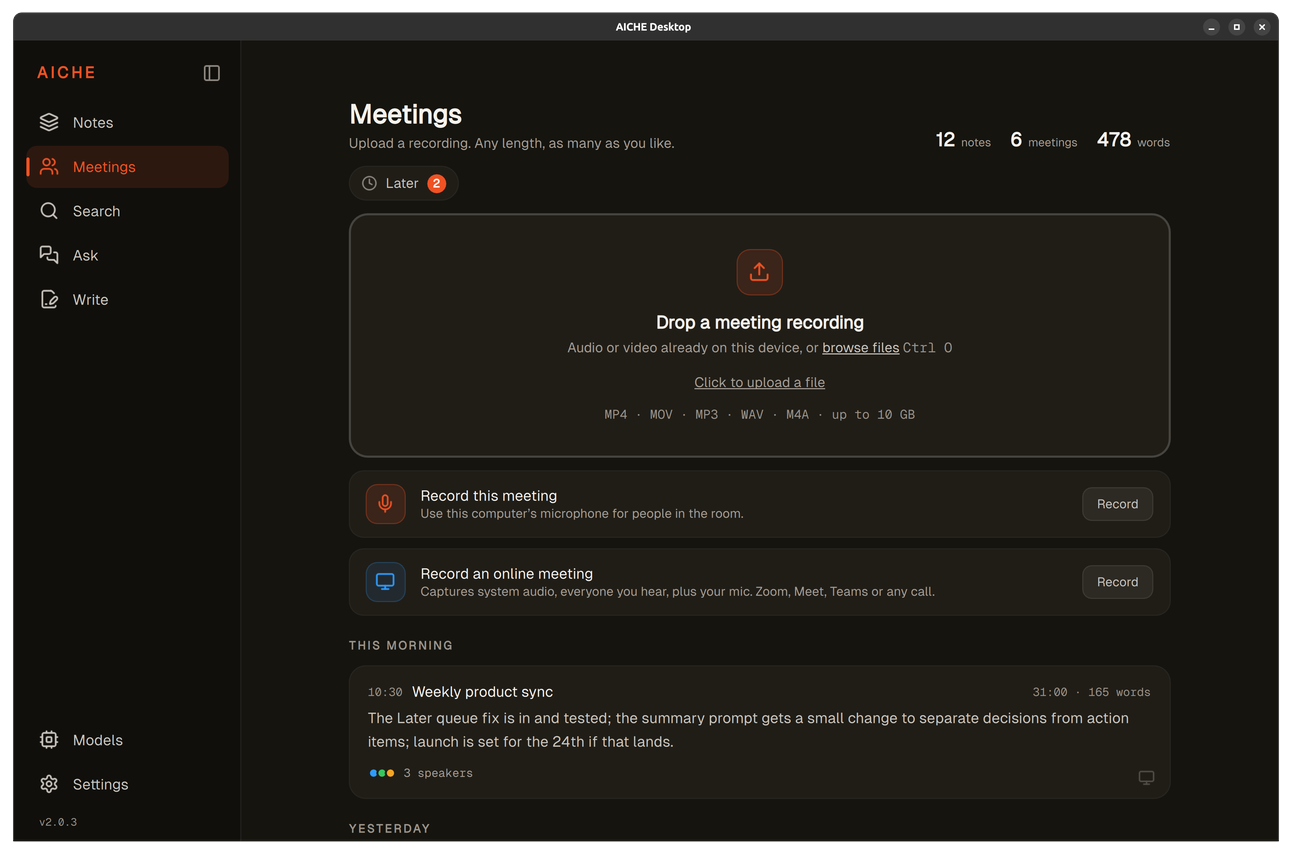
- Record this meeting, use your computer's microphone for people in the same room. Click Record next to Record this meeting, then click Start recording in the confirmation dialog.
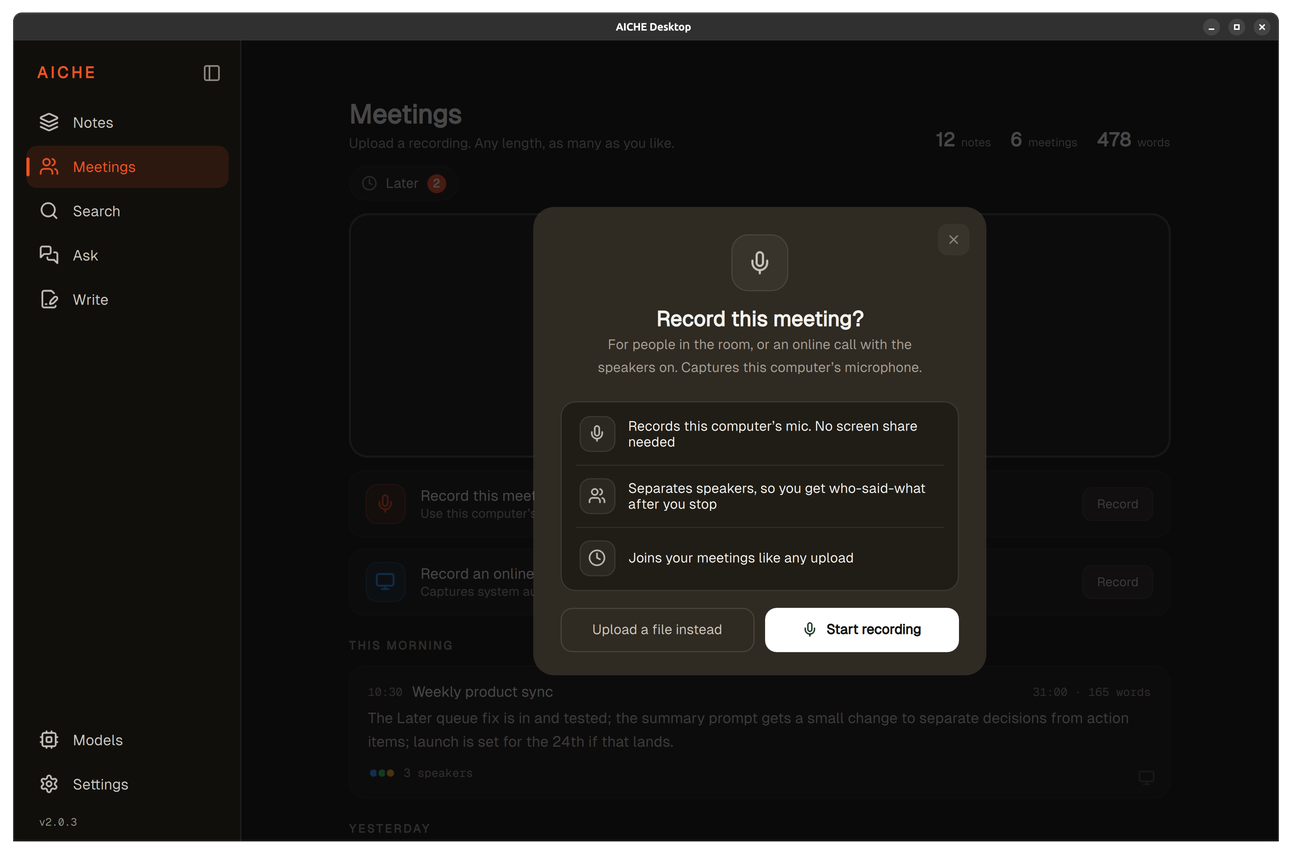
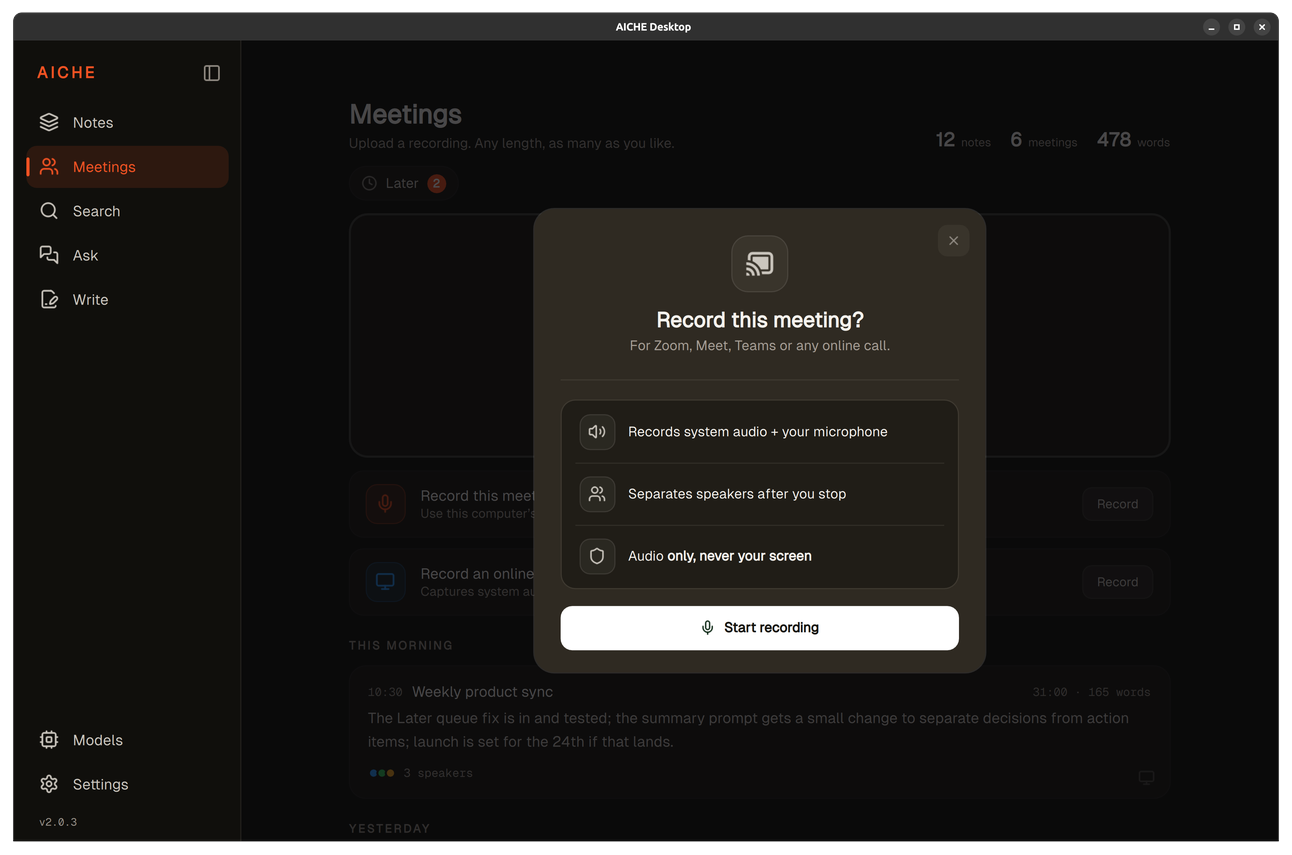
- Record an online meeting, capture system audio plus your microphone for Zoom, Meet, Teams, or any other call. Click Record and confirm when the dialog asks you to start. AICHE records audio only, never your screen.
- Drop a file, if you already have an audio or video recording, drag it onto the drop zone or click browse files. Supported formats: MP4, MOV, MP3, WAV, M4A, up to 10 GB.
Stop the recording when the meeting ends.
Step 2: Transcribe now or later
After you stop recording or add a file, AICHE processes it on your device when local Meetings is enabled in Models, or uploads it for cloud processing when you're connected.
You can also record a meeting without an internet connection and transcribe it later. Unprocessed recordings stay on your device in Later. When you're ready, open Later and choose Process or Process All. Processing uses local Meetings when enabled, or the cloud when you're connected.
If an upload or processing step fails, open Later and use Process or Try again on the recording to resume processing.
When transcription finishes, the meeting appears in the meeting list, grouped by date. Each card shows the meeting title, duration, word count and number of speakers identified.
Step 3: Review the transcript and summary
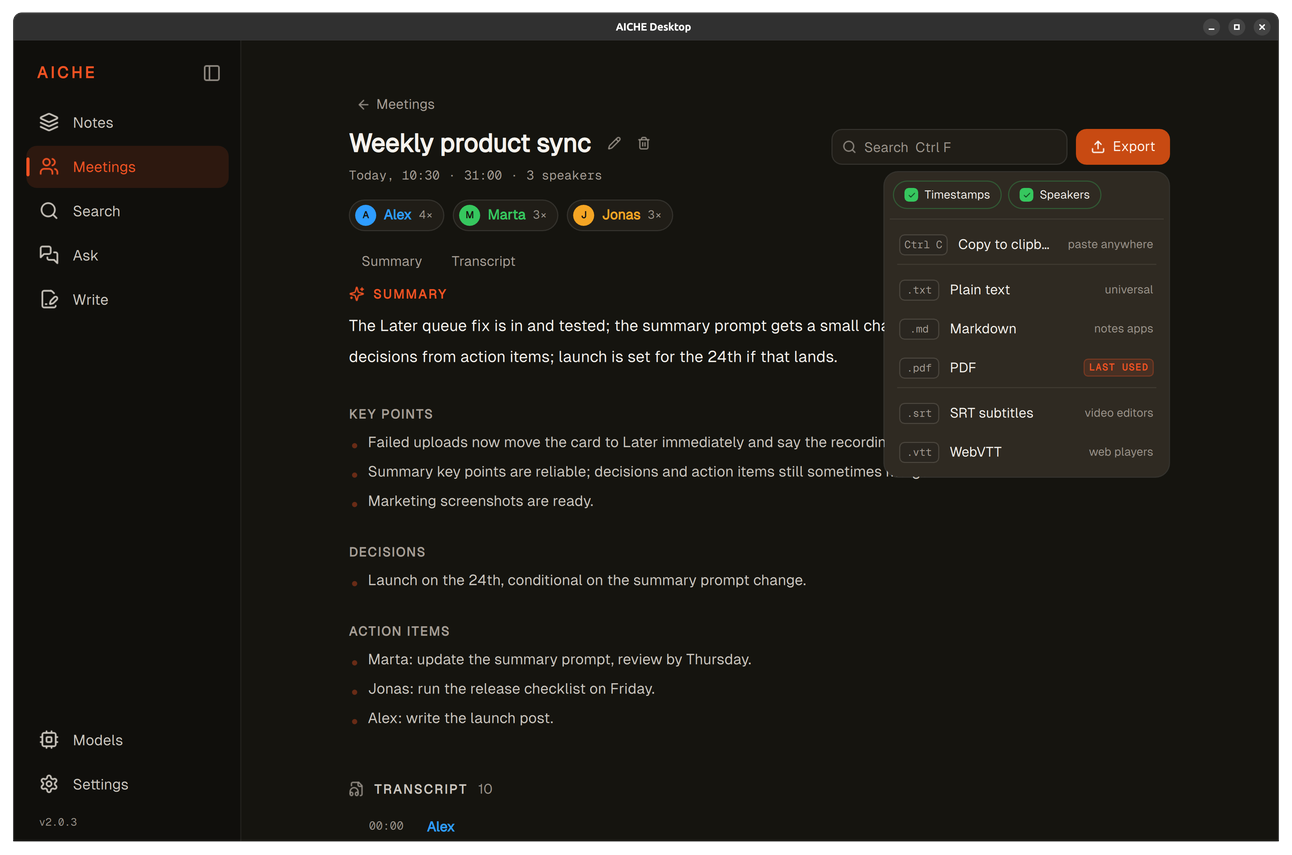
Click the meeting card to open the detail view. You'll see two tabs:
- Summary, a short overview, key points, decisions, and action items, including owners mentioned in the conversation. Select Summarize this meeting to generate it.
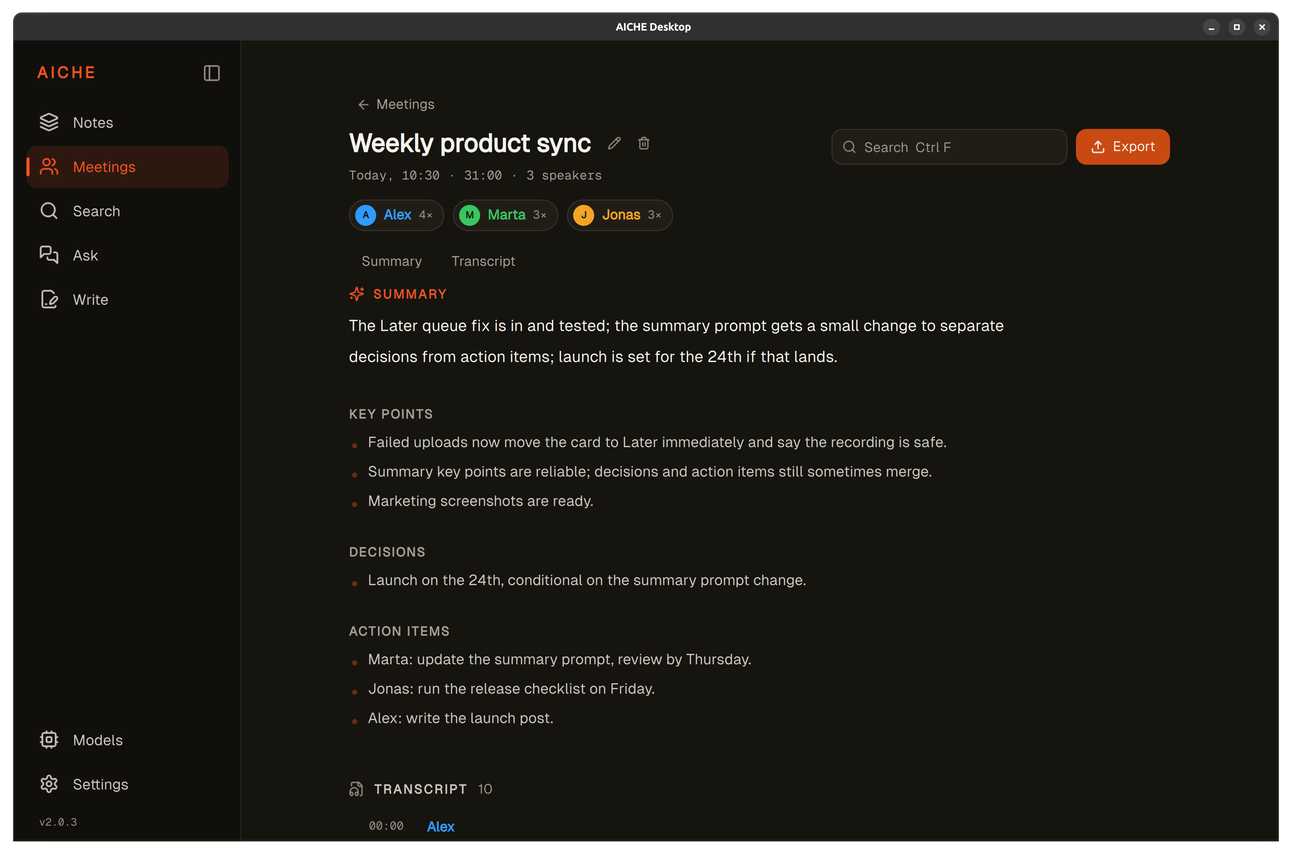
- Transcript, the full speaker-labelled transcript with timestamps. Speakers are labelled by default and you can rename them to match real names.
Use the search bar at the top of the detail view to find a specific word or phrase within the meeting.
Step 4: Export or share
Click Export in the top-right corner of the detail view. Choose from:
- Plain text (.txt), universal, works anywhere
- Markdown (.md), for notes apps and documentation
- PDF, for documents and formal sharing
- SRT subtitles, for video editors
- WebVTT (.vtt), for web players
For text, Markdown and PDF exports, choose whether to include timestamps and speaker names. SRT and WebVTT retain subtitle timing; the Speakers option controls whether names appear in the subtitles.
Use Copy to clipboard (Ctrl+C) to paste the result into another app without saving a file.
Where to go next
- Ask: query anything across your notes and meetings, with answers grounded in specific sources.
- Search: find any word or phrase across all your notes and meetings.
- Models: choose which features run locally and which use cloud processing.
- Keyboard Shortcuts: adjust your microphone, hotkeys, and transcription preferences.